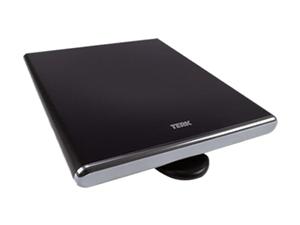
Terk MFTV1A Omnidirectional OTA TV antenna. I will use it outdoors on my antenna mast
My existing “Over The Air” broadcast TV antenna, an Antennas Direct DB4e, has a range of about 60º, but my house here in Toronto, Canada is situated with TV stations in the range of 70-80º. However I point my antenna, either I drop stations from the east in Buffalo, or west in Hamilton. Smack in the middle of my range are the overly strong stations of Toronto, which can overpower weaker stations. I am attempting to use a Terk MFTV1A indoor omnidirectional antenna, installed outdoors on my antenna mast, to increase my antenna range to beyond 60º.
Since the range of my antenna is not sufficiently wide I need some way of widening it, but I do not need very much extra range. West of Hamilton has no stations that I can pick up.
I found a Terk MFTV1A indoor antenna and wondered if it could widen my range. The Terk is an omnidirectional indoor antenna with a sleek black plastic cover. Indoors, where there is no rain, wind or other elements, it would be entirely appropriate. Out of doors, on top of my roof mount, the plastic mounts provided would be too weak to withstand the fierce winds. I would need to figure out some alternative way of mounting the antenna that would be sufficiently strong.
The Terk site had some outdoor antennas, two that were suspiciously very similar to their indoor ones. Instead of mounting the antenna with the flat part facing the wind, similar to a kite, as I had originally thought, they faced the top edge facing the wind, greatly reducing the surface area and therefore pressure of the wind. While this did not negate the need to strengthen the mount, it did make the solution simpler. I would not need to counter as strong winds as I had thought.
My first idea was to run 2 “U” shaped bolts through it, where the U portion would attach to my existing antenna mast, but as the antenna would be pointing top edge to the wind, the new 90º turn means I would need a new solution. It was clear that the plastic shell would be too weak to support the mount. I would need to mount some kind of plate to the antenna face, or the wind would rip the Terk right off my mast.
The Terk MFTV1A indoor antenna is comprised of a back plate, a front plate, and a chrome coloured bottom cap. The front plate has the Terk logo. The back and front plates comprise the clam shell. The top of the antenna housing is a moulded part of the back section. The bottom of the antenna housing is a chrome coloured plastic cap. While not air tight, the plastic fits really well together.
The original plastic stand for the Terk can be attached to the back or the chrome bottom piece, using nuts embedded into the plastic. These small nuts are barely strong enough for indoor use and would not be sufficiently strong for an outdoor installation.
To add a mounting plate to the bottom I would need to open the clam shell. Remove the plastic stand and disgard. The first piece to open would be the chrome coloured bottom cap. Take two small flat head screwdrivers and wedge the smallest one in between the cap and the clam shell. Then take the second screwdriver and open the crack even more. The cap is attached to the clam shell with plastic hooks that fit into the cap’s indentations. As you wedge your screwdrivers you will hear these hooks open. The hooks are about 2″ apart. With some care you can remove the cap from the clam shell without too much damage. Be gentle, as this is not a place to be hamfisted.

Terk MFTV1A Indoor Antenna: Plastic hooks on one side attach to indentations on the other side of the clamshell

Terk MFTV1A Indoor Antenna: Plastic indentations on one side attach to hooks on the other side of the clamshell
To open up the clam shell, use the same 2 flat head screwdrivers and wedge them in between the top and back of the clam shell. The top has the hooks and the bottom has the indentations. It is not difficult to open up the clam shell.
The antenna is a printed circuit board (PCB) that is almost all covered, top and bottom, with conductive material. I did notice a couple of capacitors, but not very much. There are no moving parts and few parts of anything. You cannot drill through the PCB because if there is a uncovered section on one side it will be covered on the other. Drilling straight through the antenna would not be possible.
The output cable is soldered directly to the PCB and cannot be simply detached. The cable has a rubber grommet that would make it water tight as it enters the clam shell, good for outdoor mounting. The PCB can be lifted out and away from the clam shell very easily. The PCB fits into the rear clam shell using 4 guide pins, moulded into the bottom clam shell. The pins also place the PCB so it does not touch either the top or bottom clam shell.
I decided to use a piece of 2×8 pine as the mounting plate. From the inside of the bottom clam shell I drilled 6 1″ screws to secure it to the 2×8. As the antenna will be pointing top edge to the wind I believe 6 screws should be sufficiently strong. I will need to find some L bracket to mount the antenna to my mast.

Terk MFTV1A Indoor Antenna: Inside of the antenna, top side

Terk MFTV1A Indoor Antenna: Inside of the antenna, bottom side
Adding a second antenna to an existing one might prove problematic, as the second antenna could pick up the same station signal as the first antenna, resulting in ghosting. I might need to add some mesh shielding to the Terk so it will not pick up station signals from Buffalo or Toronto, but only the ones from Hamilton and west. The shiending can be attached to the 2×6 mounting plate. I will also need a splitter and a short coax cable the same length as the Terk’s.
All this is experimental but I have all summer to figure this out. I am very happy with my current OTA TV antenna, which has performed admirably throughout the winter and through some very strong winds. Fog will disrupt the signals from Buffalo, but thankfully we do not have fog very often. Rain and snow does not affect my signal, which surprised me.
With the addition of the Terk I should be able to point the DB4e antenna further east and use the Turk to pick up Hamilton OTA TV, giving me better range of coverage. I am not worried about Toronto stations as they are close and somewhat overpowering.

Interesting. I disassembled a Terk and was surprised to find the elaborate array inside. Patch antennas are not broadband by nature. They have used some serious technique here to try to broadband this antenna, a combination of patches and meander elements. Note the tiny 2-hole balun at the end of the stripline in the middle of the board.
I built my own antenna by clipping an old Sony UHF bow tie across the open side of a cardboard box. The bow still has its 300-ohm ribbon wire and balun and they work fine. I laid kitchen foil in the bottom of the box to serve as a reflecting backplane, which really helped reception quality. It cost me ZERO dollars, and has consistently outperformed every manufactured HDTV antenna and preamp that I have compared it with. Some are jokes and even have scam elements.
I live in a wood frame building with aluminum siding. The transmitters are all northwest and I live on the southwest corner. I may be getting reception through the windows of the north facing suites, via the walls. Or by reflections.
The TV that I use for these comparisons is a small Samsung. I generally get 5 or 6 good signals. The SNR diagnostic says 30+ dB during solid reception but when it goes under 20 dB the signal drops out badly. The set does not handle weak signals as well as my older, full size Samsung in the bedroom, which gets all 8 signals in the city and rarely drops out. Dropouts can even cause the set to lock up and ignore the remote and front touch controls, forcing me to unplug it and repower it.
My reception is better when the weather is better. When it rains in the city, it’s snowing at the transmitters. I wonder if this is why I see dropouts only during storms, or if it’s trees moving in the wind near my building.
73!!